The ultimate home lab dash with agentic AI features bolted in. Single sign-on, HTTPS enforced, dockerised and modular. Can be run completely offline too!
Offline HomeLab Dashboard (MCP Integrated)
![]()


Overview
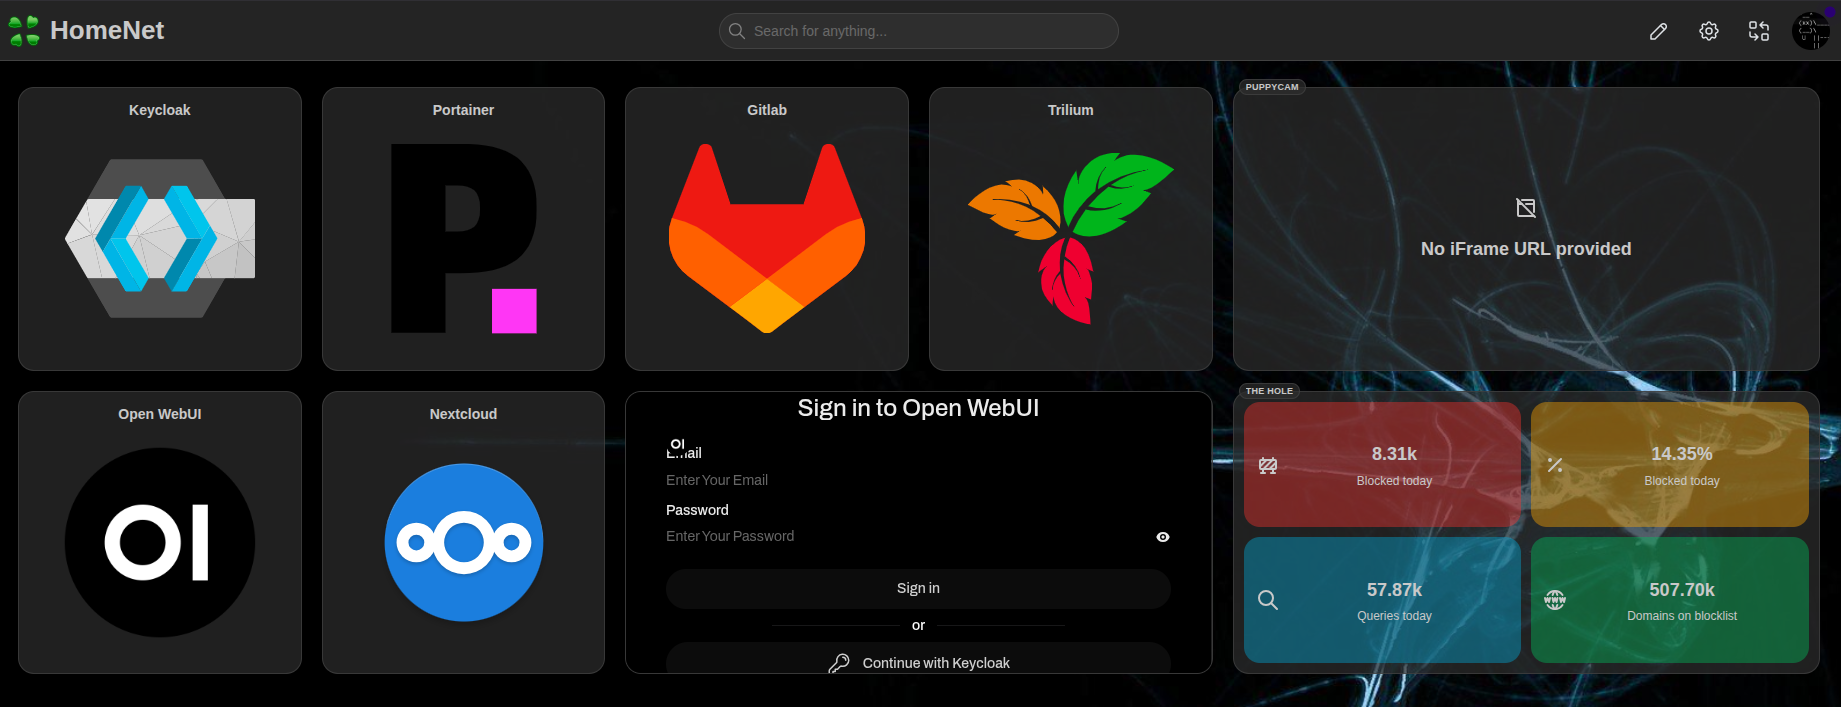
This homelab dashboard, built on Homarr, provides a centralized interface for managing your entire self-hosted ecosystem. It leverages Caddy to reverse-proxy all Docker containers across your subnet while enforcing HTTPS using self-signed certificates — all without requiring external internet access.
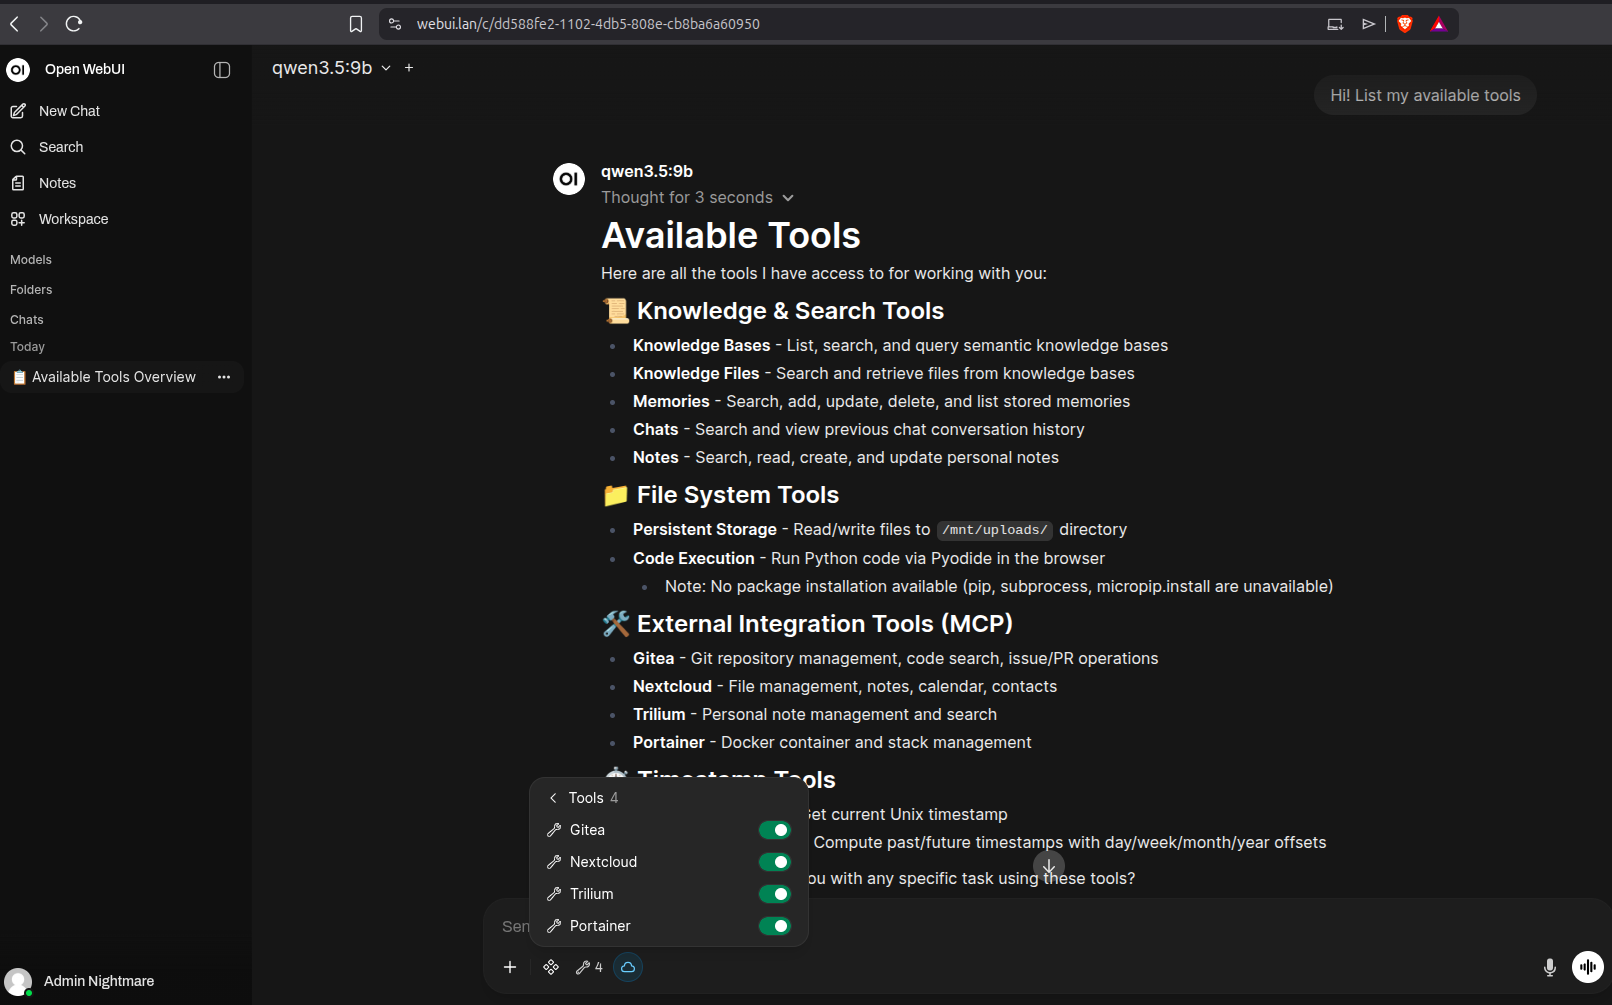
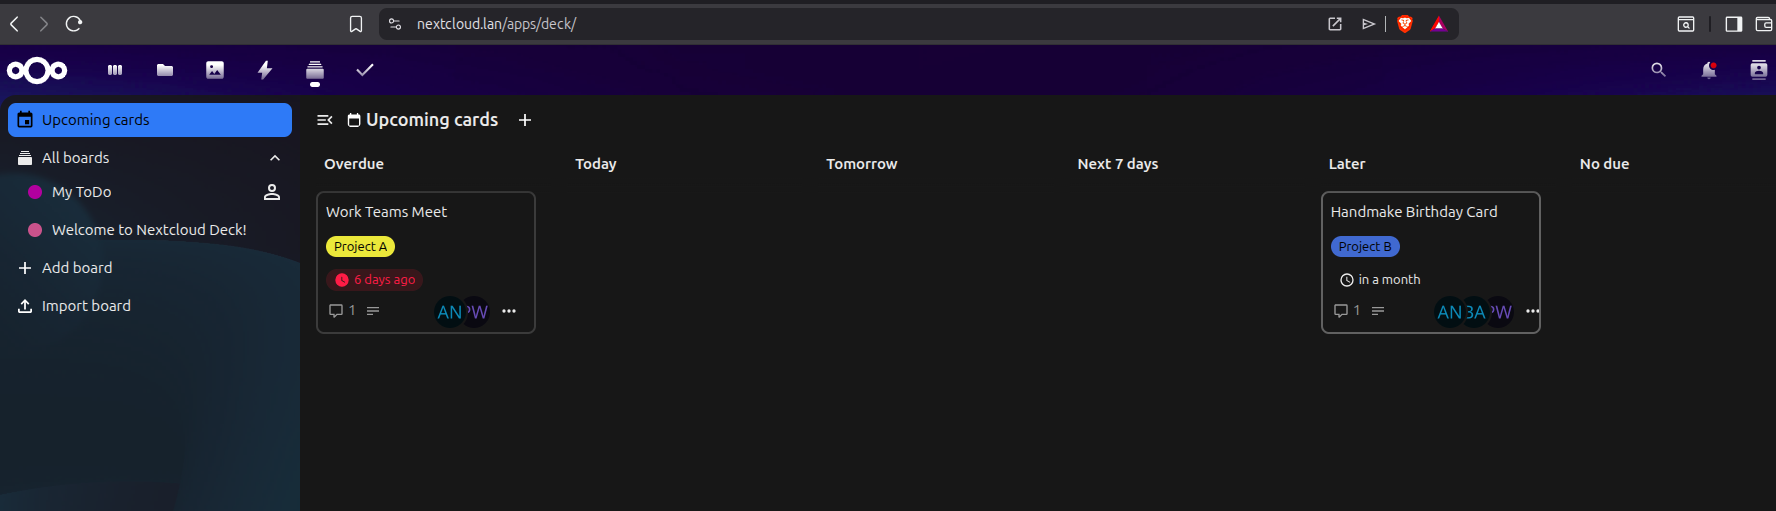
The dashboard comes pre-configured with powerful tools including Nextcloud, GitLab, Trilium, Portainer, Open WebUI, and Restreamer for live video monitoring. Open WebUI integrates with Ollama for agentic AI capabilities through MCP (Model Context Protocol), enabling intelligent automation across your applications.
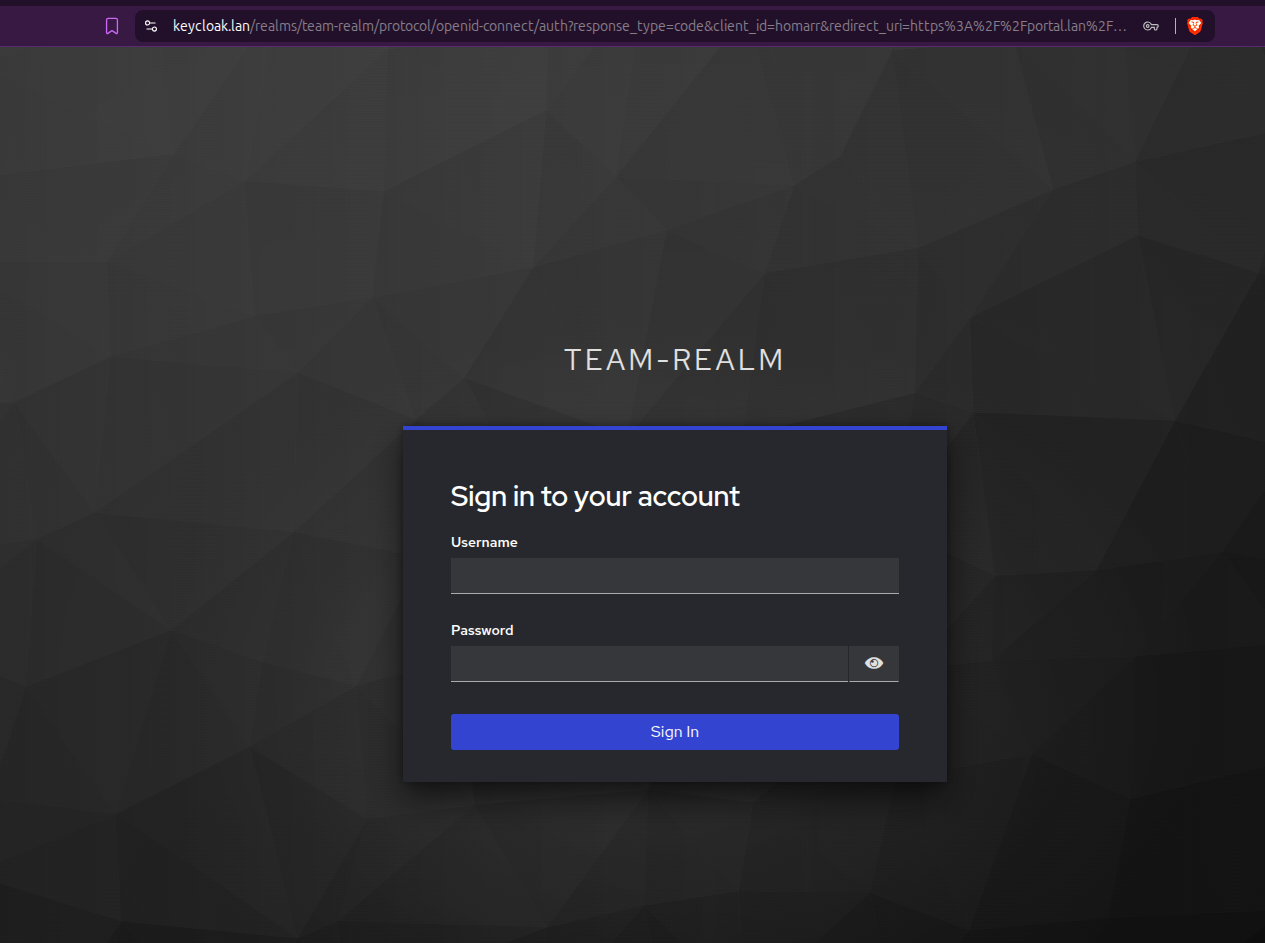
For additional security and user management, Keycloak handles centralized authentication and group management via single sign-on. Eliminating the need for multiple account creations and complex password policies.
Best of all, it works completely offline. Optional VPN integrations (ZeroTier, Tailscale) integrate easily for remote access if needed.
Each application runs as an independent container with its own domain, allowing you to distribute apps across virtual machines or dedicated hardware appliances for granular resource control.
Key Features
- ✅ Fully Airgapped — Works in completely offline environments
- 🤖 Agentic AI — Ollama-powered models handle tasks across your apps via MCP
- 🔐 Centralized SSO — Keycloak manages all users and groups
- 🔒 HTTPS & Self-Signed Certs — Secure by default
- 🚪 Limited External Facing Ports — Everything runs internally on your LAN
- 📦 Portable & Modular — Tested on Debian; easily distribute across hardware
- 🎯 Extremely Flexible — Add, remove, or customize apps with minimal effort
Getting Started
chmod +x launch_dashboard.sh./launch_dashboard.sh- Stick with default IP addresses, domains, ports and realm names until you know what you're doing.
- Unless you set a password during install, it will be available in the
docker-compose.yml - Remember to regenerate your Client Secret in Keycloak, copy it and paste it into the highlighted
docker-compose.ymlvariables (# <---- Insert from Keycloak)
Post Installation Guide
Certificates!
-
Export Root CA Certificate
- If you intend on accessing the portal from another machine, you'll need to copy the
rootCA.crtfrom./certsand install it on that device. - Wherever you host the
Caddyfile, you'll need to point it at every app'scertandkey.pemfiles. - When adding new apps to the environment, from the machine you launched the
launch_dashboard.shfrom, run:
and transfer the 2 files to themkcert <new_app.lan> <new_app.lan> <new_app.lan>/certsfolder that Caddy is pointed at.
- If you intend on accessing the portal from another machine, you'll need to copy the
-
Understanding the Architecture
- All applications run on HTTP internally through Docker ports
- Caddy handles HTTPS termination and exposes services on port 443
Initial Config Steps
- Log into Keycloak using the
adminpassword (found indocker-compose.yml) or as you remember setting during install.- If you have issue accessing Keycloak, edit the
docker-compose.yml, removing any special characters from your admin password and run;-
docker compose down keycloak && docker compose up -d keycloak
-
- If you have issue accessing Keycloak, edit the
- Click Create Realm and if you do use the provided backup, import
realm-export.JSONfrom the appropriate drive. - Navigate to Realm Settings → Action (top-right) → Partial Import
- If starting fresh, create a new realm with a dedicated admin user (do not use the default
Masterrealm!). - Create users and assign them to groups.
- Ensure Email Verified is selected.
- Add email, names and passwords for each user.
- If you did not use the
realm-export.JSONbackup file, you'll need to map yourgroupsto the Realm roles;- Select
Client Scopesfrom the left menu. Create Client Scope- 'Name' =
groups| 'Type' =Default| 'Display on consent screen' =off| 'Include in token scope' =on|Save - Select the
Mapperstab →Add mapper→From predefined mappers| Selectrealm roles,client roles,audience resolve - Select
Add mapper→By configuration→Group Membership| 'Name' =groups| 'Token Claim Name' =groups| 'Full group path' =off|Save
- Select
Adding a New Website to the LAN
Client (aka. Application) Configuration
- Create a client with Client Authentication enabled.
- Authentication Flow: Enable Standard Flow (some apps require Direct Access - check official docs).
- PKCE Method: Leave unselected unless documentation specifies S256 (SHA256).
- URLs:
- Root, Home, and Post-Logout URLs:
https://<app>.lan - Valid Redirect URIs:
https://<app>.lan/*orhttps://<app.lan>/oauth/oidc/callback(check the official docs for the app).
- Root, Home, and Post-Logout URLs:
- Credentials Tab: Regenerate and copy the client secret into your
docker-compose.yml - Client Scopes Tab:
- Select the hyperlinked
xxx-dedicatedscope. - Add:
username,email,groupsfrom the Add Predefined Mappers list. - Create the
groupsscope if it doesn't exist via the Configure New Mapper options;- Select Group Membership
- Name =
groups - Token Claim Name =
groups - Full group path =
off - Save
- Select the hyperlinked
- Now for each client (application), copy the
credential secretand paste it into the appropriatedocker-compose.ymlfile environment variable if required. - Similarly, within the appropriate
docker-compose.ymlfile, you may need to input yourrealm-namewhere specified. - Run;
docker compose down && docker compose up -d
Application-Specific Setup
Open WebUI
-
Backup Files
models-xxx.json→ Upload to Admin Settings → Modelsopenwebui-configxxx.json→ Upload to Admin Settings → Database
-
Admin Settings Configuration
- Enable New Sign-ups
- Enable API and set permissions for integrations and models.
- Recommended models for 24GB+ GPU minimum:
qwen3-coder:30Borqwen3.5:8b(4-bit quantization minimum).
-
Pull Additional Models
docker exec ai-ollama ollama pull <model>
Nextcloud
- Create a local admin user.
- Install the OpenID Connect Backend application.
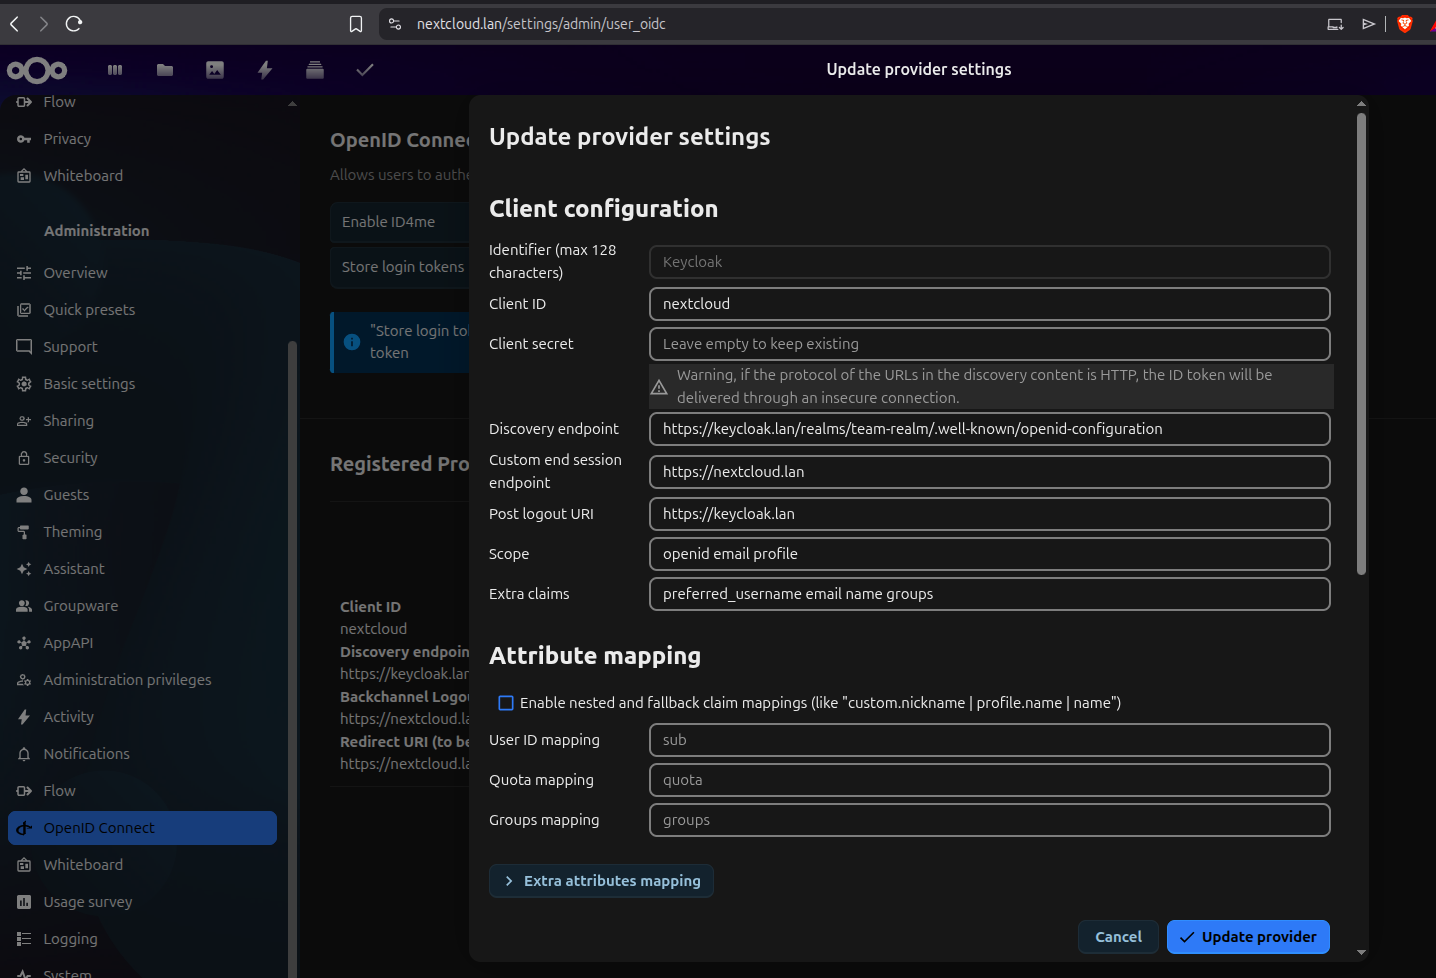
- Navigate to OpenID Connect and register Keycloak with these settings:
- Discovery Endpoint:
https://keycloak.lan/realms/YOUR_REALM_NAME/.well-known/openid-configuration - Backchannel Logout URL:
https://nextcloud.lan - Redirect URI:
https://nextcloud.lan - Client Secret: From Keycloak Credentials
- Provider:
Keycloak - Client ID: Must match Keycloak exactly
- Scope:
openidemailprofile - Extra claims:
preferred_usernameemailnamegroups
- Discovery Endpoint:
Homarr
Important: Some apps require an initial local admin user.
- Create a local admin user with a unique username
- Create a Homarr admin group that you will also apply to Keycloak (e.g.,
homarr-admins) - Add your local user to this group in the app.
- Add the
./certs/rootCAcert to Management → Tools → Certificates - Be aware that new users will automatically be loaded to a default
everyonegroup and permissions are required to be afforded to new boards and integrations.
Restreamer to Homarr
-
Homarr relies on video.js as it doesn't understand native protocols, such as RTSP
-
An encoder is required, such as 'Restreamer' to convert from H.264 to HLS or FLV over HTTP
-
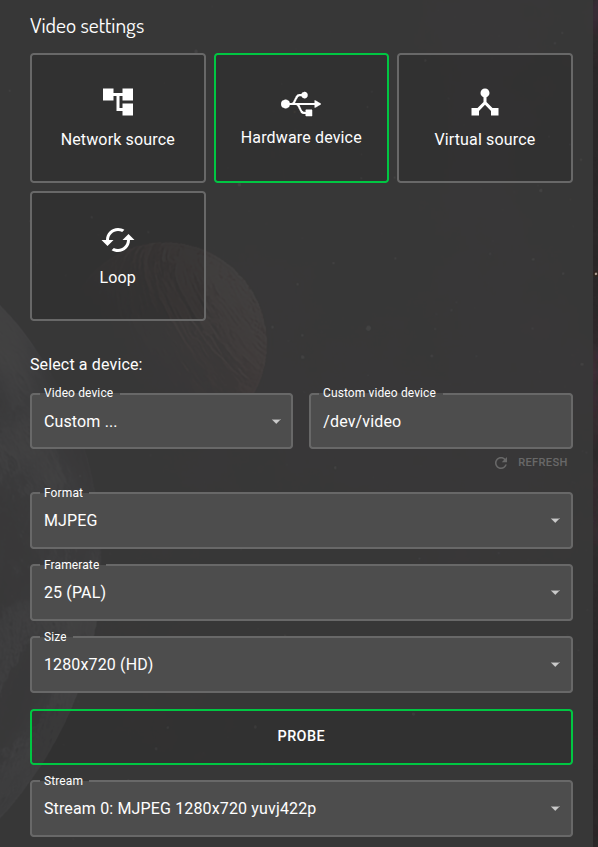
As Docker will need direct access to the attached camera through the hardware, it's counterintuitive to generate a docker-compose file for Restreamer when the camera could be on any machine on the LAN. Instead, you'll find 2 commands below to spool up Restreamer. One for ephemeral use and one for storing data. If you're running offline, the datarhei images will need to be pre-pulled;
- Temporary:
docker run --rm -d -p <ext_ip_add:port for Caddy to connect to>:8080 --device /dev/<cam location>:/dev/video -e "RS_MODE=USBCAM" -e "RS_USBCAM_VIDEODEVICE=/dev/video" --tmpfs /tmp/hls datarhei/restreamer- Permanent:
docker run -d -p <ext_ip_add:port for Caddy to connect to>:8080 --device /dev/<cam location>:/dev/video -e RS_HTTPS=true -e "RS_MODE=USBCAM" -e "RS_USBCAM_VIDEODEVICE=/dev/video" --tmpfs /tmp/hls -v /mnt/restreamer/db:/core/config -v /opt/restreamer/data:/core/data datarhei/restreamer` -
Paste to the 'video streaming' item in Homarr's dashboard -> http://ip:port/memfs/.m3u8 | also found on Restreamer, under the cam channel, marked
HLS -
If the above fails, use an 'iframe' item in Homarr and paste the HTML link | found on Restreamer, inside the
Playerconfig options. NOT the iFrame link! Homarr manages that for you. -
See example config:
Considerations
- Caddyfile: Add client configuration with the matching exposed port from
docker-compose.yml. (ie....ports: "8080:80"= ...ports: "expose_to_caddy:internal_docker") - Hosts File: Update
/etc/hosts. In most cases, every domain needs to point to the Caddy IP. Caddy is the only machine that needs to know who-is-who. - HTTPS: Never enable in-app HTTPS or certificate use as this is all managed through Caddy.
- User Auto-Population: Groups and user details populate automatically on first sign-in. No need to create new users in apps, aside from an initial local admin.
Docker Commands
| Command | Purpose |
|---------|---------|
| docker ps | Check status of running containers |
| docker exec ai-ollama ollama list | List Ollama models |
| docker compose -p team-platform logs -f <service> | Follow service logs |
| docker compose -p team-platform down <service> | Stop service(s) |
| docker compose -p team-platform up -d <service> | Start service(s) |
Note: Run compose commands from the directory containing
docker-compose.yml. Omit<service>to affect all services.
Ollama Model Management
# Pull a model
docker compose -p team-platform exec ollama ollama pull <model:quantization>

# List available models
docker compose -p team-platform exec ollama ollama list

# Delete a model
docker compose -p team-platform exec ollama ollama rm <model>
⚠️ Notes
-
Each
docker-compose.ymlenvironment is unique—refer to official application documentation for specific configurations -
This setup is still being tested; please report any issues or improvements
-
The bulk of the work is automated by the installation script!
-
If you choose to deploy an app on another machine, just copy the relevant
docker-compose.ymlsegment for that app and create a newdocker-compose.ymlfile on that machine and edit;- Any references to IP address in the environment variables.
- Port exposure that Caddy reaches out to - if required in order to avoid clashes with other running services.
/etc/hostsshould always point to the Caddy IP address, except the machine hosting Caddy - update this machine's/etc/hostswith the new IP.- Update the Caddyfile to reach out to the new host IP.
- Remember to upload the rootCA.crt onto the new machine.
-
Don't neglect your firewall rules!
sudo ufw default deny incoming && sudo ufw default allow outgoing && sudo ufw reloadAs a minimum.
Project Gallery
License
This project is licensed under the MIT License - see the LICENSE file for full details.
AI Disclaimer
Much of the content within the launch_dashboard.sh script was generated individually at different times with different hosts. Grok and Claude Sonnet were used to
assist orchestrating these elements together into one file, particularly for handling complex kernel-level and permissions issues, while also improving the script's
runtime appearance and user experience.
Every line has been carefully reviewed, edited and tested by the main contributor to ensure safety and correctness. Nothing was left unchecked.