Lark Base MCP Server(w/ Personal Token)
base-mcp-server
A Model Context Protocol server that provides read and write access to Feishu Base (飞书多维表格) databases. This server enables LLMs to inspect database schemas, then read and write records.
Usage
1. Install Node.js
Make sure Node.js is installed on your machine.
2. Obtain Base Tokens
Get the appToken and personalBaseToken for your base account.
3. Install MCP Server Package Globally
Install the MCP server package globally using npm:
npm install -g @lark-base-open/mcp-node-server
4. MCP Server Configuration
In your MCP server configuration file, add the following:
{
  "mcpServers": {
    "base-mcp-server": {
      "command": "npx",
      "args": [
        "@lark-base-open/mcp-node-server",
        "-a",
        "appToken of base",
        "-p",
        "personalBaseToken of base"
      ]
    }
  }
}
Note: If you are using Claude, you will need to add the MCP configuration through the Developer option in the Claude client settings. You can access this in the Settings menu, and then add the MCP server details under the relevant section.
tokens
You need get two tokens before using this mcp server.
-
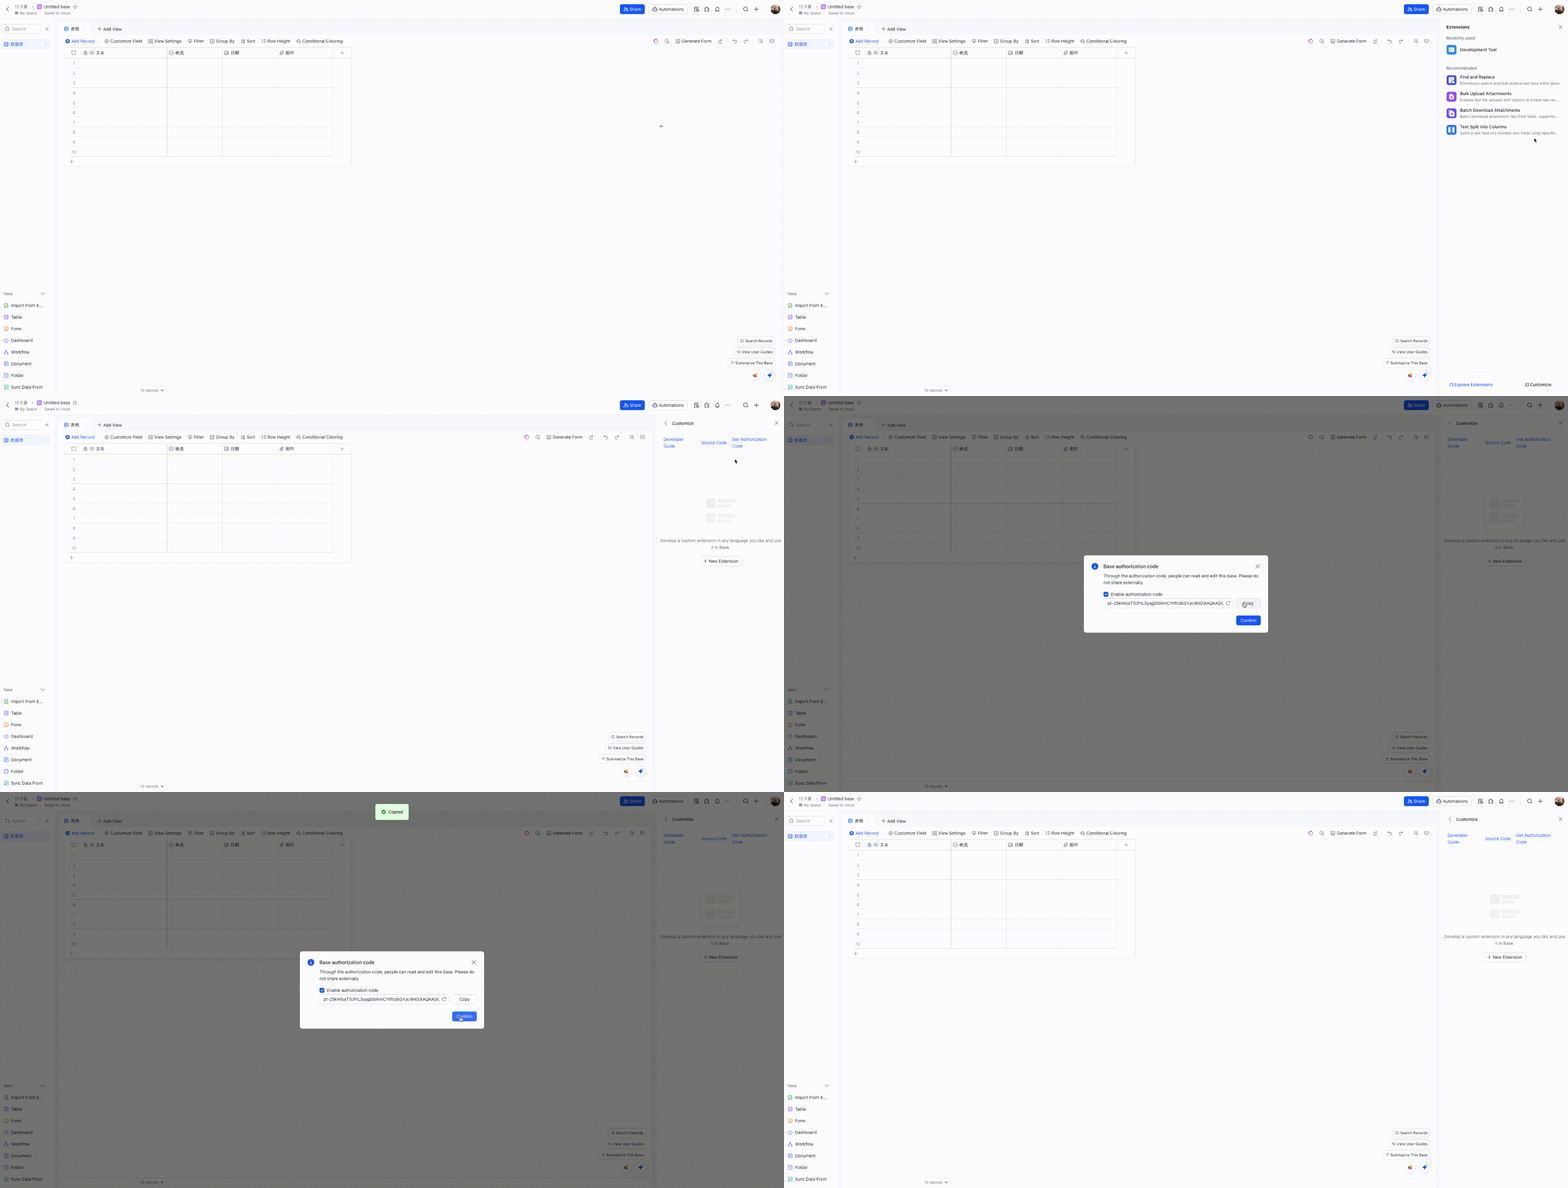
personalBaseToken: find Base Plugin UI in your base, and access Custom Plugin->Get Authorization Code

-
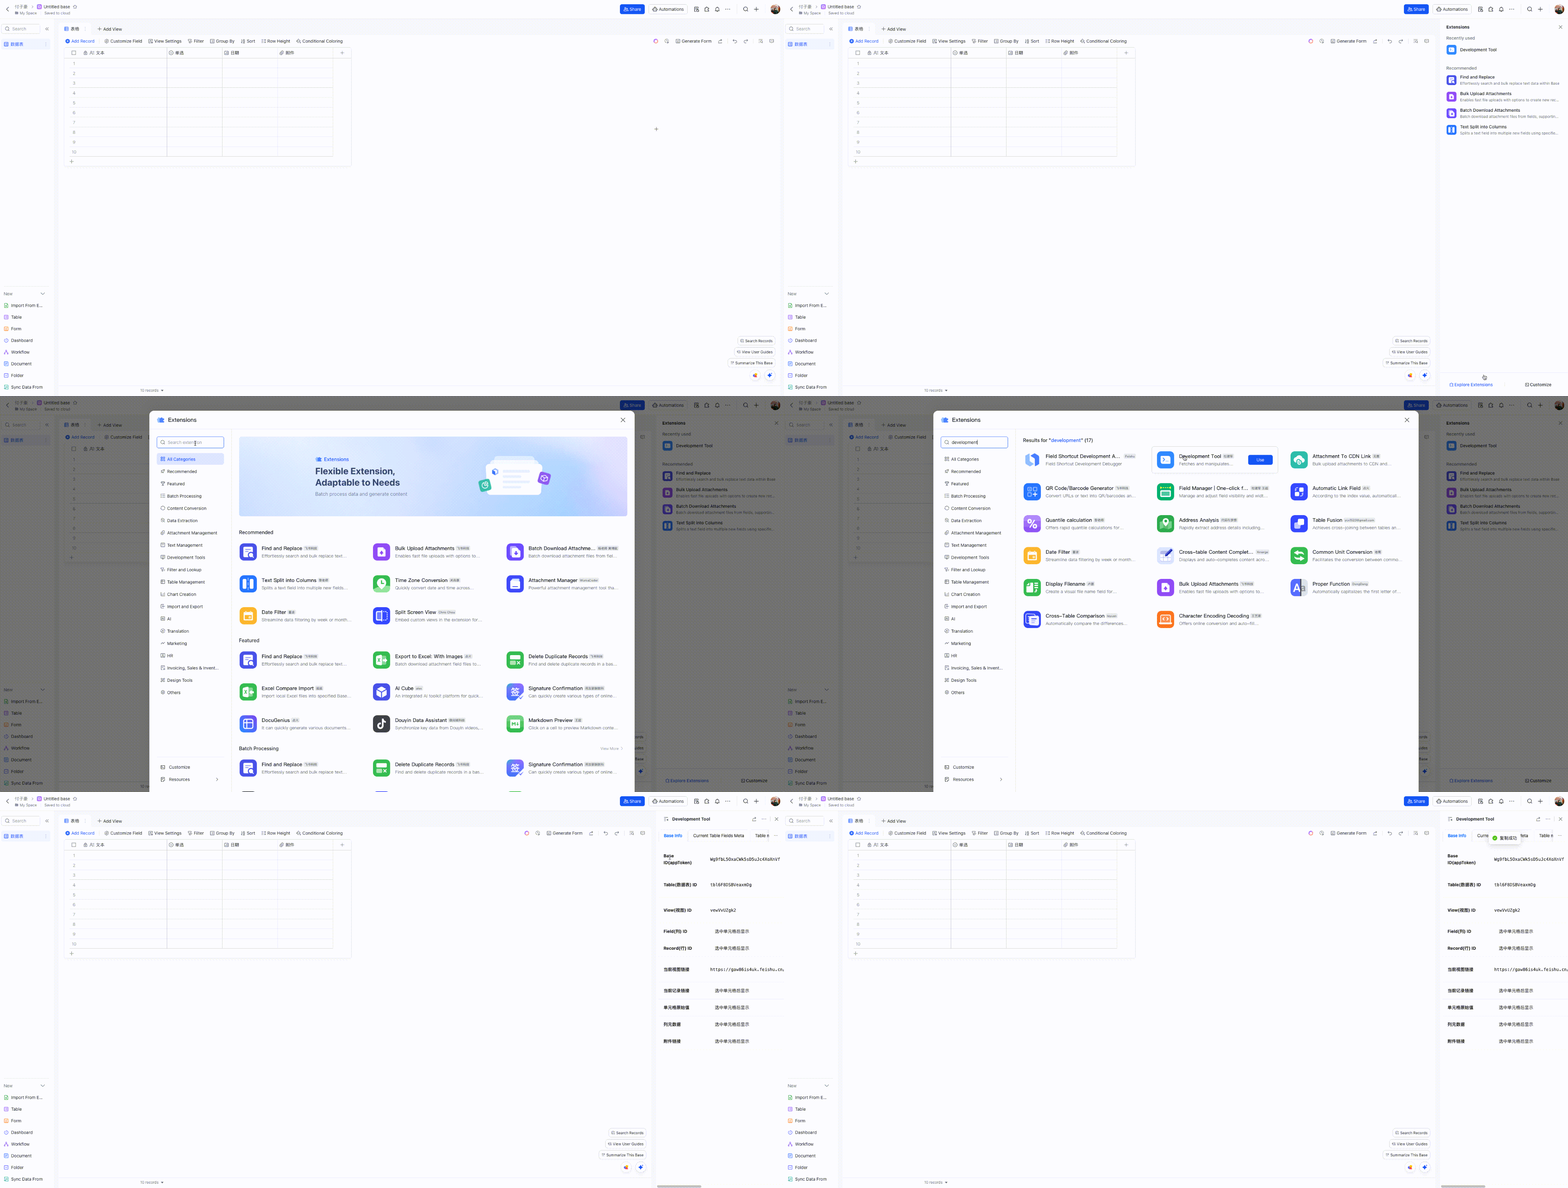
appToken: You can obtain the
appTokenquickly through a Developement Tool plugin. Here’s a simplified step-by-step process on how to do it:
Components
Tools
-
list_tables
- Lists all tables in a base
- No input parameters required
-
list_records
- Lists records from a specified table
- Input parameters:
tableId(string, required): The ID of the table to query
-
get_record
- Gets a specific record by ID
- Input parameters:
tableId(string, required): The ID of the tablerecordId(string, required): The ID of the record to retrieve
-
create_record
- Creates a new record in a table
- Input parameters:
tableId(string, required): The ID of the tablefields(object, required): The fields and values for the new record
-
update_record
- Updates a record in a table
- Input parameters:
tableId(string, required): The ID of the tablerecordId(string, required): The ID of the recordfields(object, required): The fields to update and their new values
-
delete_record
- Deletes a record from a table
- Input parameters:
tableId(string, required): The ID of the tablerecordId(string, required): The ID of the record to delete
-
create_table
- Creates a new table in a base
- Input parameters:
name(string, required): Name of the new tablefields(array, required): Array of field definitions (name, type, description, options)
-
update_table
- Updates a table's name
- Input parameters:
tableId(string, required): The ID of the tablename(string, required): New name for the table
-
delete_table
- Deletes a table
- Input parameters:
tableId(string, required): The ID of the table to delete
-
list_fields
- Lists all fields in a table
- Input parameters:
tableId(string, required): The ID of the table
-
create_field
- Creates a new field in a table
- Input parameters:
tableId(string, required): The ID of the tablenested(object, required): Field configuration object containing:field(object, required): Field definition with name, type, and other properties
-
update_field
- Updates a field in a table
- Input parameters:
tableId(string, required): The ID of the tablefieldId(string, required): The ID of the fieldnested(object, required): Updated field configuration
-
delete_field
- Deletes a field from a table
- Input parameters:
tableId(string, required): The ID of the tablefieldId(string, required): The ID of the field to delete
Development
To get started with development:
- Install Node.js
- Clone the repository
- Install dependencies with
npm install - Run
npm devto start the development server - Run
npm testto run tests - Build with
npm build
Available scripts:
npm dev: Build and run the server in development modenpm start: Run the servernpm test: Run testsnpm test:watch: Run tests in watch modenpm lint: Run ESLintnpm build: Build the projectnpm build:watch: Watch for changes and rebuild automatically
Project Structure
.
├── src/                # Source code
│   ├── index.ts       # Main entry point(stdio)
│   ├── index.sse.ts   # SSE entry point
│   ├── service/       # Service implementations
│   ├── types/         # TypeScript type definitions
│   ├── utils/         # Utility functions
│   └── test/          # Test files
├── dist/              # Compiled output
Dependencies
Main dependencies:
@lark-base-open/node-sdk: Feishu Base Node.js SDK@modelcontextprotocol/sdk: Model Context Protocol SDKexpress: Web frameworkzod: Schema validation
License
MIT