org-mcp-demo
Custom GitHub Copilot Agents with Neo4j MCP Cypher Server
This repository demonstrates how to set up custom GitHub Copilot agents that integrate with the Neo4j MCP Cypher Server.
Specifically, this showcases a custom agent that automatically generates high-quality Python Neo4j client libraries with best practices including:
- Pydantic models for type safety
- Repository pattern for clean query organization
- Parameterized Cypher queries to prevent injection attacks
- Integration tests using testcontainers
- Modern Python packaging with pyproject.toml
Important: This repository contains example agent configurations and documentation only. The actual custom agents are deployed in the organization-level grandcloud-oss/.github-private repository, where they are available across all repositories in the organization.
This setup was created in the grandcloud-oss organization where I had administrator privileges. Organization administrator privileges are required to create the .github-private repository and configure organization-level custom agents with MCP server integrations.
Testing MCP Servers Directly
Before creating custom agents, it can be useful to first test the Neo4j MCP Cypher Server directly to ensure it's working correctly. This allows you to verify connectivity and functionality independently from the agent configuration.
See the GitHub documentation on extending the coding agent with MCP for instructions on how to configure and test MCP servers locally.
This repository includes two example configurations for the Neo4j MCP Cypher Server in sample-mcp-config/:
neo4j-mcp-docker-config.json- Docker-based MCP server configurationneo4j-mcp-local-config.json- Local Python-based MCP server configuration
What are Custom GitHub Copilot Agents?
Custom agents extend GitHub Copilot's capabilities by providing specialized tools and domain-specific knowledge. They can be configured to use external tools, APIs, and MCP servers to perform complex tasks beyond standard code completion.
For more details on custom agents, see:
Critical: Organization-Level Setup for MCP Servers
IMPORTANT: If your agent uses MCP servers, it MUST be created at the organization level in a private .github-private repository.
Individual repository-level agents cannot access MCP servers and will not work. This repository does not contain the actual agents - they must be created in your organization's .github-private repository.
See the official GitHub documentation on creating custom agents for detailed setup instructions.
Prerequisites
-
Create a
.github-privaterepository in your organization first. This is a special private repository that GitHub uses for organization-level configurations. See the GitHub documentation on adding a member-only organization profile README for instructions on creating this repository. -
Organization administrator privileges are required to create and configure the
.github-privaterepository -
Access to organization-level settings for environment variables and secrets
Repository Structure
Your organization should have a .github-private repository with the following structure:
<your-org>/.github-private/
└── copilot/
    └── agents/
        ├── your-agent-1.md
        └── your-agent-2.md
Organization and enterprise owners can create custom agents in a .github-private repository that are available across all repositories within their organization or enterprise.
Example Agents
This repository includes two example agents that demonstrate different approaches to running the Neo4j MCP Cypher Server:
1. Docker-Based Agent
See org-setup-files/agents/neo4j-docker-client-generator.md
This agent runs the Neo4j MCP Cypher Server inside a Docker container.
2. Python Direct Agent
See org-setup-files/agents/neo4j-local-client-generator.md
This agent runs the Neo4j MCP Cypher Server directly as a Python command.
Agent File Layout
Each agent definition follows this structure:
---
name: agent-name
description: Brief description of what the agent does
tools: ['read', 'edit', 'search', 'shell', 'mcp-server-name/*']
mcp-servers:
  server-name:
    type: 'local'
    command: 'command-to-run'
    args: ['arg1', 'arg2']
    env:
      VAR_NAME: '${ENVIRONMENT_VARIABLE}'
    tools: ["*"]
---

# Agent Instructions

Your agent's detailed instructions go here...
Environment Variables Configuration
Getting environment variables to work correctly with MCP servers requires careful configuration. After extensive testing, this format works reliably:
1. Create Environment Variables at Organization Level
Create these environment variables in your GitHub organization settings:
COPILOT_MCP_NEO4J_URICOPILOT_MCP_NEO4J_USERNAMECOPILOT_MCP_NEO4J_PASSWORDCOPILOT_MCP_NEO4J_DATABASE
Important: Use the COPILOT_MCP_ prefix for all MCP-related variables.
2. Create Environment Variables in Repository
Also create the same environment variables at the repository level:
- Go to Settings → Environments
- Create an environment named
copilot - Add all the same variables with their values
3. Configure Workflow Setup
The Python-based agent requires a GitHub Actions workflow to set up the Python environment. This is critical for agents that run the Neo4j MCP Cypher Server directly.
See .github/workflows/copilot-setup-steps.yml for the workflow configuration.
This workflow ensures that the Python environment and required Neo4j MCP Cypher Server packages are available when Copilot agents execute.
Testing Your Custom Agent
Once your agent is configured, follow these steps to test it:
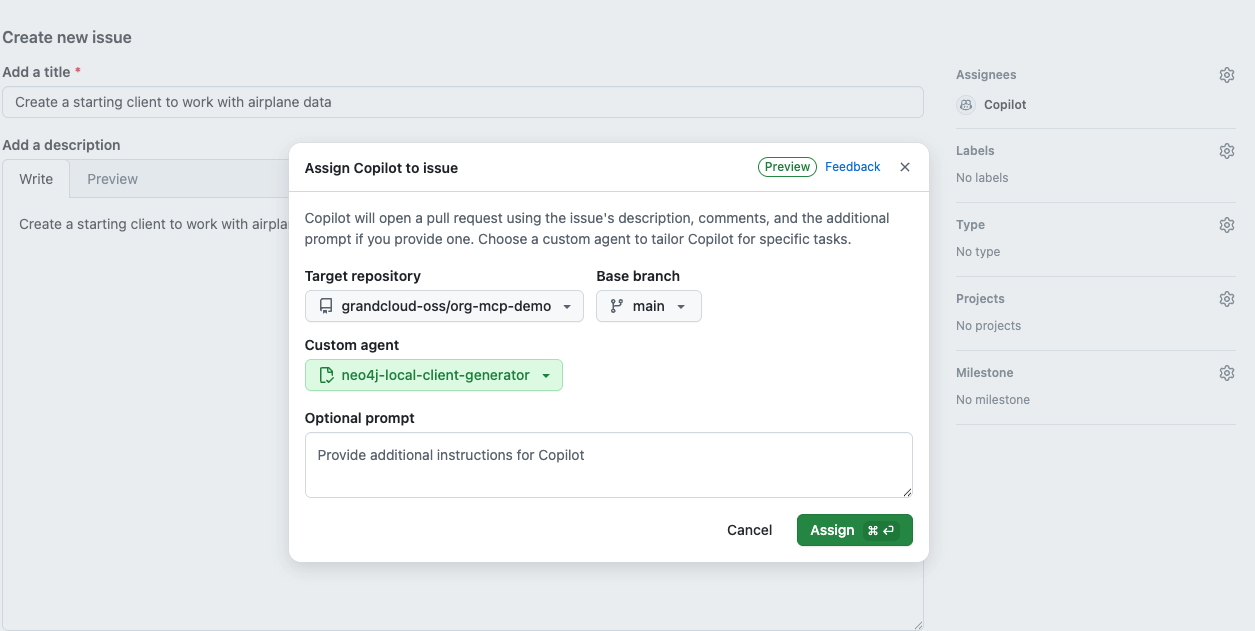
1. Create and Assign an Issue to Copilot
Create a new issue in your repository and assign it to Copilot.
Important: You must click away from the assignment dropdown after assigning to Copilot, then return to set the custom agent. The custom agent selection will not be available until you click out first.
2. Monitor Agent Startup
Give the agent a couple of minutes to start up. Once it begins, you'll see "Copilot started work on..." in the issue comments. Click on that link to see the status and logs.
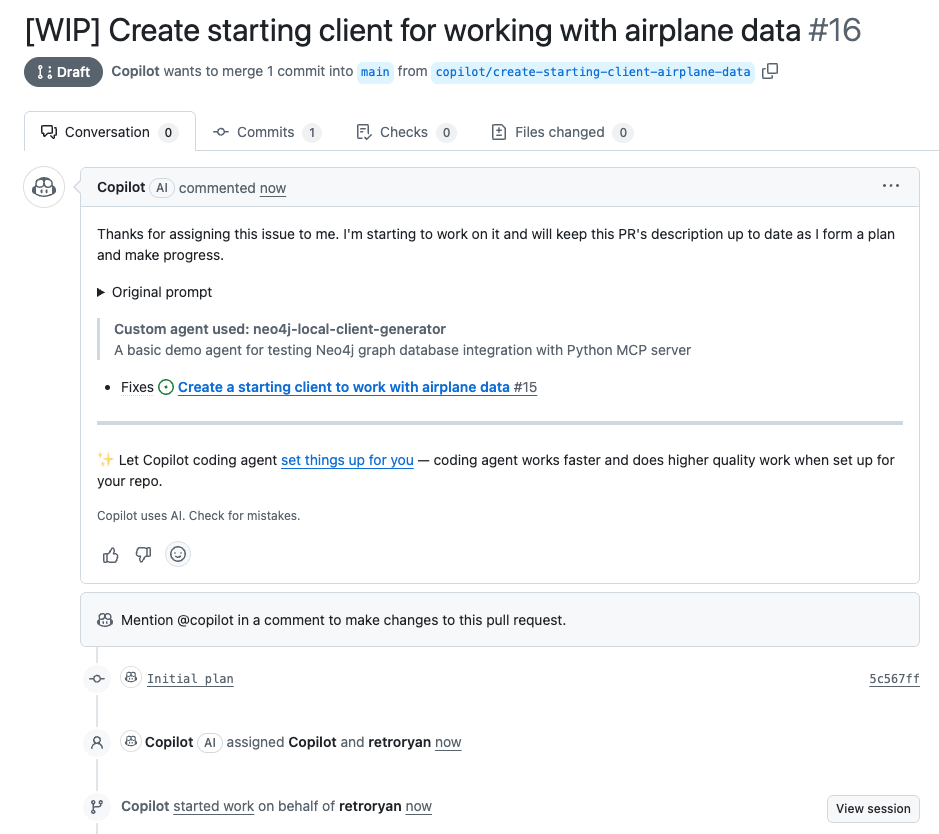
3. Verify MCP Server Connection
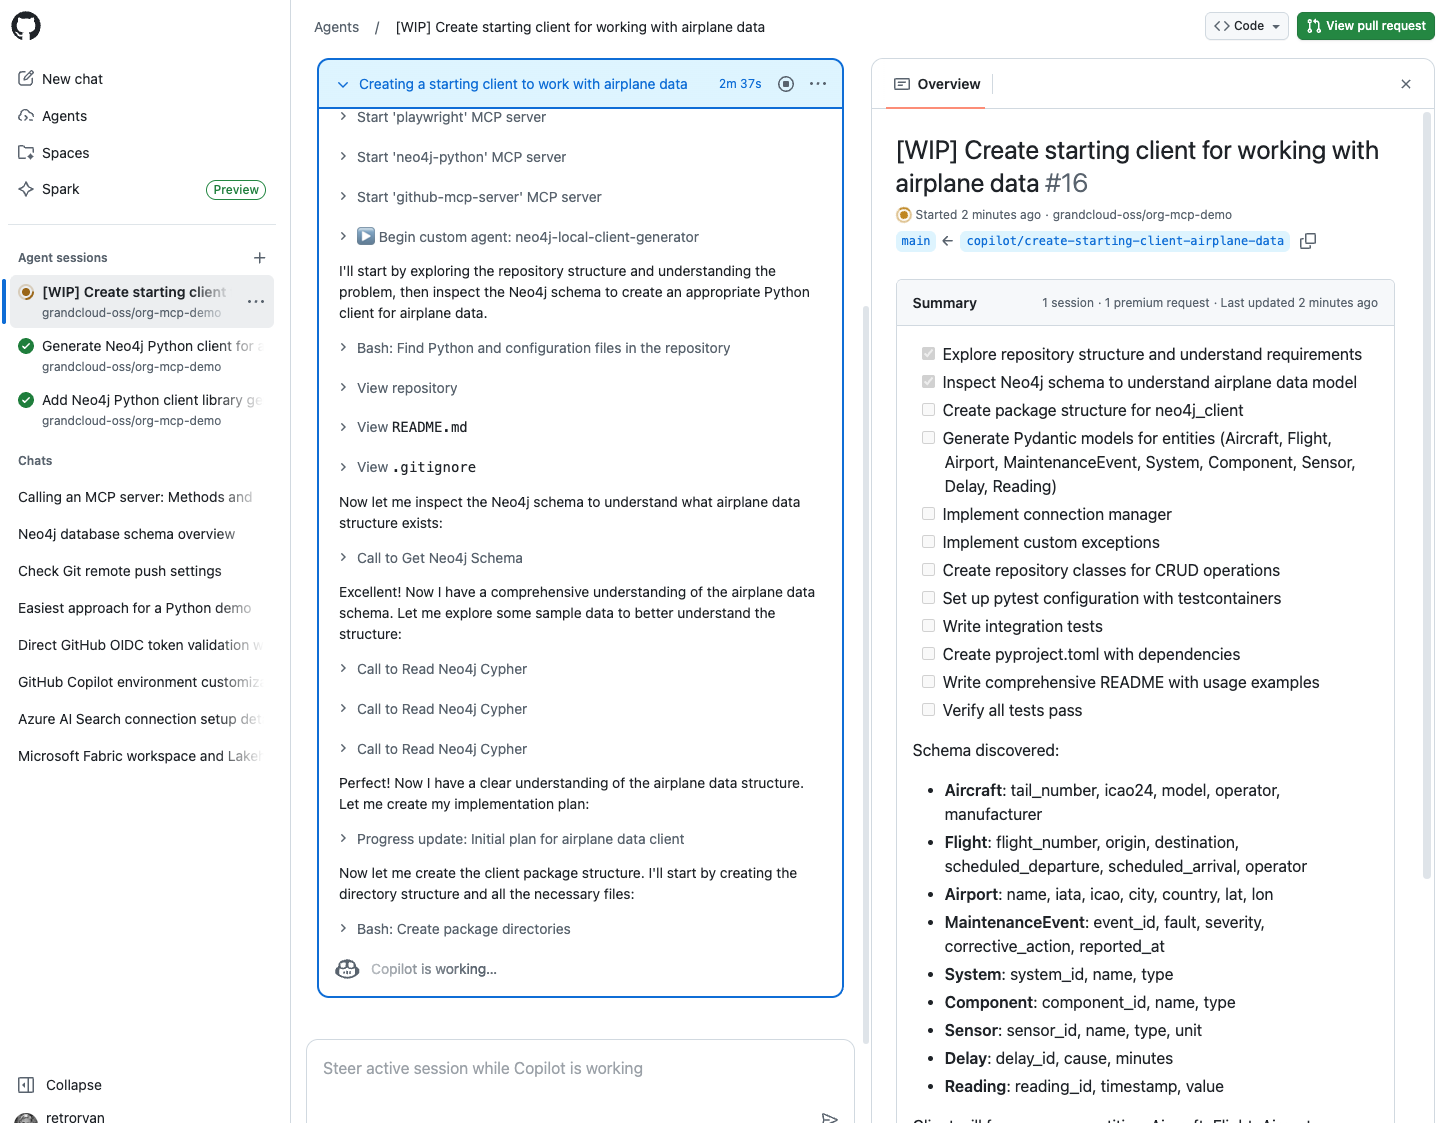
Once started, you'll see the agent connect to Neo4j and retrieve the schema, confirming that the MCP server integration is working correctly.
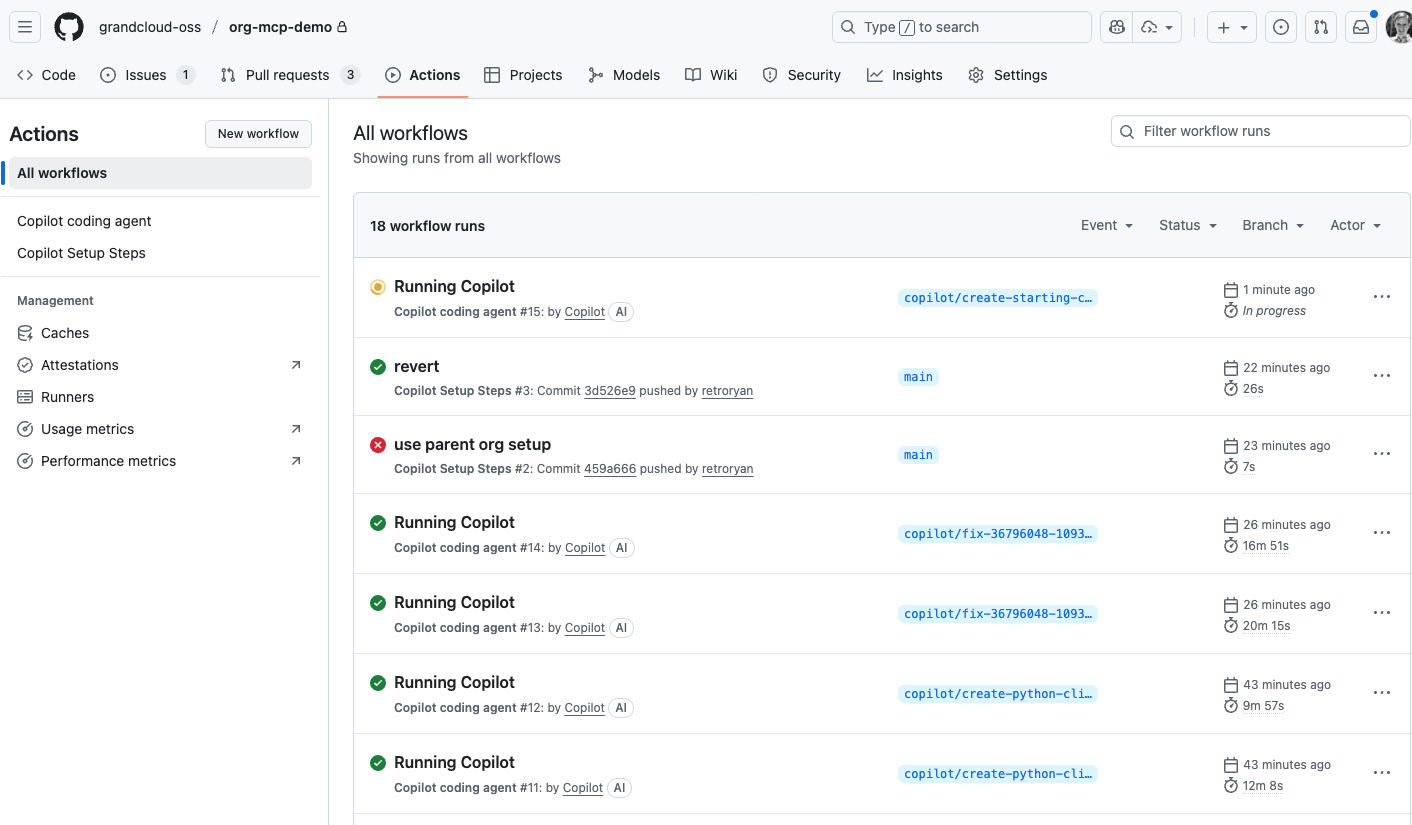
4. View Detailed Debug Logs
You can go to the Actions tab in your repository to see detailed debug logs for each agent run.
Example Output
For a complete example of what the agent generates, see PR #16 which shows a full Python Neo4j client library generated by the custom agent, including models, repository patterns, tests, and documentation.
Summary Checklist
When setting up custom agents with MCP servers:
- [ ] Create agents in organization-level
.github-privaterepository - [ ] Define MCP server configuration with proper
command,args, andenvmapping - [ ] Create
COPILOT_MCP_*environment variables at organization level - [ ] Create matching environment variables in repository settings under
copilotenvironment - [ ] Set up
.github/workflows/copilot-setup-steps.ymlfor Python-based MCP servers - [ ] Test agent with simple queries before deploying complex workflows